Weather Data
The Xweather MapsGL SDK includes a variety of pre-configured and pre-styled weather layers for you to include in your maps, such as radar, satellite, earthquakes and storm cells. Additionally, you have complete control over their styling and can fully customize them for your needs.
Built-in weather layers are referenced by their weather layer code. Refer to our list of supported weather layers and their codes when using them within the MapsGL SDK.
Adding weather layers
To add a weather layer to your map, just use the addWeatherLayer(code: string) method on your map controller instance:
controller.addWeatherLayer('temperatures');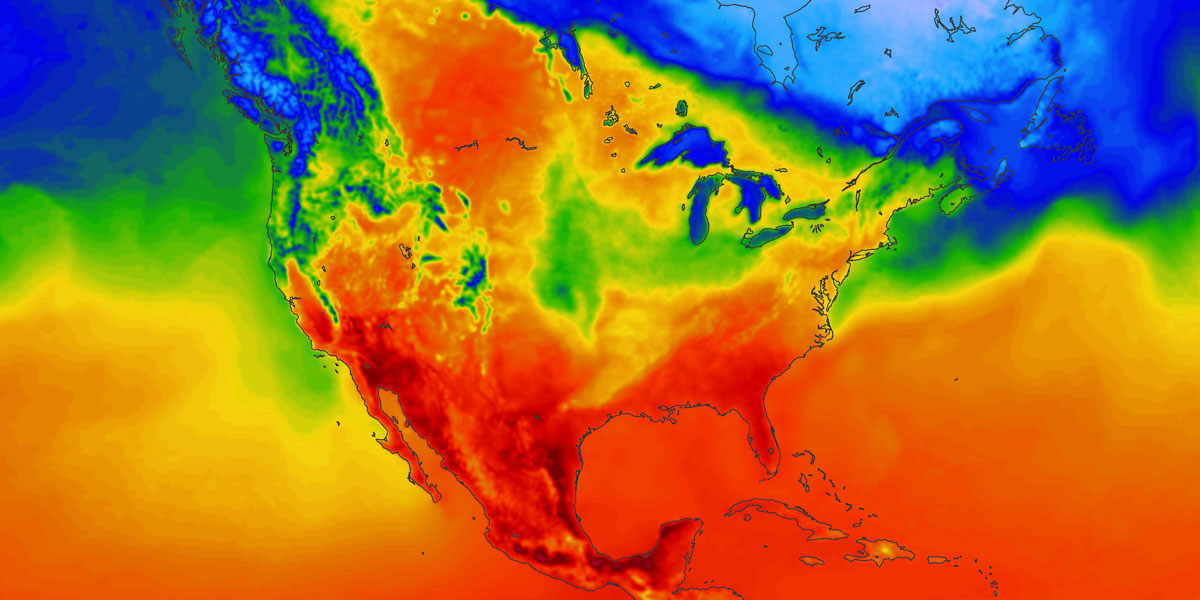
It's also easy to add multiple weather layers at once:
// adding each layer code separately
controller.addWeatherLayer('dew-points');
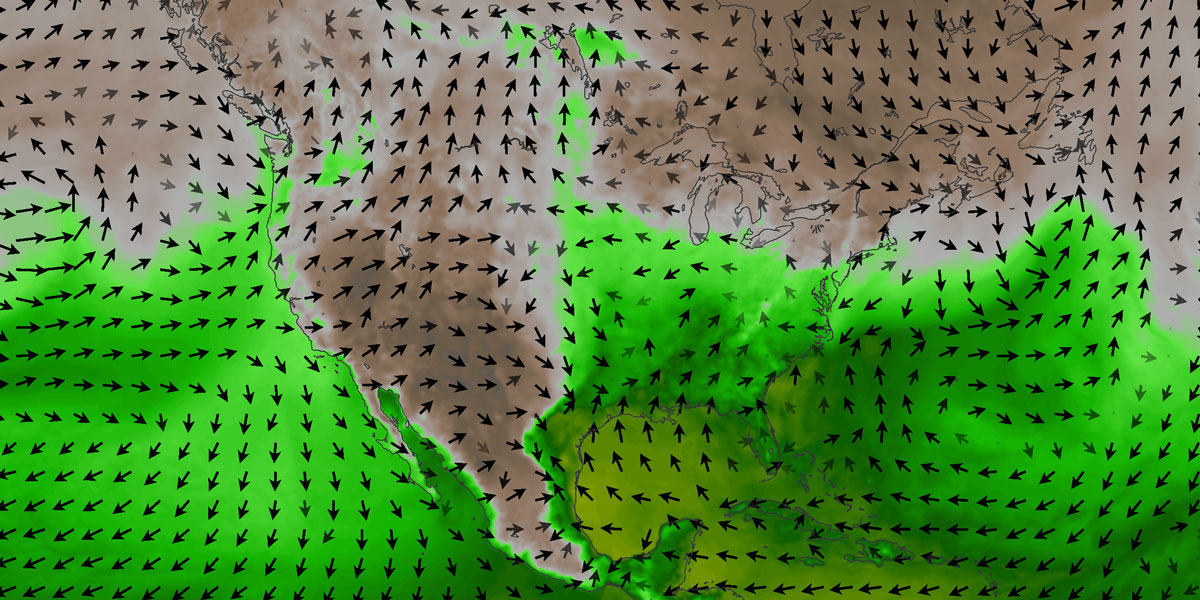
controller.addWeatherLayer('wind-dir');
// or iterating an array of weather layer codes
['dew-points', 'wind-dir'].forEach((code) => {
controller.addWeatherLayer(code);
});
Using this simple method will use the default styling and configuration for each layer provided by the SDK. However, since layers are fully customizable with MapsGL, you may decide you want to change the visual appearance of one or more weather layer when adding it to your map.
Review our weather layer styling guide for complete details regarding weather layer customizations.
Getting active weather layers
Weather layers are given a unique layer identifier internally when added to a map that takes into account any customizations that may have been provided. Therefore, you cannot use getLayer(:id) to retrieve a weather layer using its weather layer code. Instead, use the getWeatherLayer(:code) method to retrieve a weather layer by its weather layer code:
const temperaturesLayer = controller.getWeatherLayer('temperatures');If the layer already exists on the map, the above will return the existing layer instance which you can then use to get additional information about the layer itself, such as its generated unique identifier to use when adding another layer relative to its position in the layer stack:
const tempLayerId = temperaturesLayer.id;
controller.addWeatherLayer('wind-particles', null, tempLayerId);
Removing weather layers
Removing weather layers from the map is similar to adding them. To remove a weather layer from your map, just use removeWeatherLayer():
controller.removeWeatherLayer('temperatures');This will completely remove the layer from the map and dispose of all resources associated with it as needed. If you only want to hide the layer such as when toggling it on and off, use setWeatherLayerVisibility() instead. See the section on toggling weather layers for more details.
Similarly, you can also remove multiple weather layers easily:
// adding each layer code separately
controller.removeWeatherLayer('temperatures');
controller.removeWeatherLayer('wind-dir');

// or iterating an array of weather layer codes
['temperatures', 'wind-dir'].forEach((code) => {
    controller.removeWeatherLayer(code);
});
Toggling weather layers
If you are only wanting to toggle weather layers on and off, as in the case of a button click, use MapController#setWeatherLayerVisibility with the visibility argument set to false instead of removeWeatherLayer once the layer has been added to the map. This will be more efficient as layer and data source resources don't get disposed of nor do they have to be recreated when setting the weather layer to visible again.
When you're ready to add the layer back to the map, call setWeatherLayerVisibility again with the visibility argument as true instead of addWeatherLayer.
Overriding defaults
While we have provided some default styling for built-in weather layers, you may want to fully customize them to fit the identity and style of your application or to tell a different story with the same data. Our weather layers are fully customizable simply by providing your desired configuration overrides.
You can override the default configuration for weather layers by providing a second argument to addWeatherLayer containing an object with the desired property overrides. This object should be provided in the following structure:
{
    type: LayerType;
    data: Partial<{
        quality: DataQuality;
        bounds: { north: number; south: number; west: number; east: number; };
        minZoom: number;
        maxZoom: number;
        params: Record<string, any>;
        evaluator: {
            title: string;
            fn: (value: number | Record<string, number>) => string;
        };
    }>;
    timing: Partial<{
        intervals: number;
        clamp: 'past' | 'future' | never;
        range: { start: Date; end: Date; };
    }>;
    filter: ExpressionSpecification;
    paint: Partial<PaintStyleSpec>;
    legend: Partial<LegendOptions>;
}| Option | Description | Default |
|---|---|---|
type | Type: string ()The render style to use for the layer from the list of available render styles. | |
data | Type: object ()Data request options for the layer's data source, such as data quality and request parameters. | |
data.quality | Type: DataQuality ()Defines the level-of-detail (LOD) for the rendered data. See the section on managing data level-of-detail for more information on the supported values. | |
data.bounds | Type: { north: number; south: number; west: number; east: number; } ()The geographical coordinate bounds to restrict the data to. Data outside of these bounds will not be requested nor rendered. In the case of tile-based data, this will restrict the tiles requested to only those that intersect the bounds and whose coverage depends on the zoom level. | |
data.minZoom | Type: number ()Minimum zoom level to request data for. This value must be equal to or greater than the data source's default minimum zoom level and less than or equal to the maximum zoom level. | |
data.maxZoom | Type: number ()Maximum zoom level to request data for. This value must be equal to or less than the data source's default maximum zoom level and greater than or equal to the minimum zoom level. | |
data.params | Type: object ()An object consisting of additional request parameters to be included when requesting data from the layer's data source. | |
data.evaluator | Type: ()Options related to the data evaluator configuration used by a map controller's data inspector control. | |
data.evaluator.title | Type: string ()Title to be displayed for the layer in the data inspector control. | |
data.evaluator.fn | Type: function ()A function that receives the layer's data value, if any, at the queried map coordinate and returns the formatted output to display in a data inspector control. The value may be a number or an object consisting of multiple numerical values depending on layer and data source. | |
data.cities | Type: boolean ()Whether to show city name labels on the layer, which is used for text-based data query layers only. | |
timing | Type: object ()Options related the layer's timing configuration for time-based data sources. | |
timing.mode | Type: ()The timing mode to use for the layer. | |
timing.clamp | Type: none, past, future, or range ()Determines if the layer's data should be clamped to either past or future times within the range of the time series or within a specified range. If set to past or future, then the layer will only request data for past or future times relative to the current time. If set to range, then a start and end date range must be provided for timing.range. Otherwise, data will be requested for the full time series range and the layer will be visible at all times. The default is none which means the layer is valid for any time interval. | |
timing.range | Type: { start: Date; end: Date; } ()Defines the valid start and end date range for the layer. When provided, the layer will automatically be hidden outside of this date range. | |
timing.intervals | Type: number ()Specifies the maximum number of time intervals to allow for the layer. The actual intervals returned by the server may be less than this value depending on the available valid times within the requested range of the map's timeline and the data source. NOTE: Increasing this value may affect the performance of your map, so avoid setting this to large numbers. | |
timing.interleaved | Type: boolean ()Determines whether data requests for animation intervals should be interleaved, meaning they're broken up into smaller chunks and evenly spaced across the time range and progressively fill in the gaps. When false, animation intervals are loaded consecutively starting at the timeline's current position. | |
timing.operation | Type: TimeSeriesOperation ()The operation to perform on the data within the time series, if any. | |
filter | Type: ExpressionSpecification ()Filter expression to use for filtering features from the data source. This is only used for vector tile data sources whose tiles are in the Mapbox Vector Tile (MVT) format. See the documentation on filtering data for examples. | |
paint | Type: object ()Layer pain style overrides. See the list of available style options. | |
legend | Type: object or false ()Legend overrides for the layer. See the list of available legend options. If false, then the legend will not be added for the layer. | |
mask | Type: object ()Mask options for the layer. See the documentation on masking layers for more details. | |
You can choose to override one or more elements associated with a weather layer depending on which of the above properties you provide.
For example, the following example uses the temperatures weather layer but using a lower data resolution instead:
controller.addWeatherLayer('temperatures', {
    data: {
        quality: aerisweather.mapsgl.DataQuality.low
    }
});
Refer to our weather layer styling documentation for more details and examples on overriding default weather layers styles.
Getting layer metadata
You can retrieve useful metadata about all available weather layers that MapsGL supports. This metadata includes the layer's name, description, and other details that can be useful when building your application. To get this metadata, use the getLayerMetadata() method on your map controller's weatherProvider instance which will return a Promise that resolves with the metadata JSON object:
controller.weatherProvider.getLayerMetadata().then((data) => {
    console.log('metadata', data)
});
The metadata for each weather layer includes much of the same information as our weather layers reference documentation.