Xweather’s Weather API is built for compatibility with a wide range of programming languages and frameworks. For example, if you’re using a React-based framework like Next.js, you can easily fetch weather data on the server or client side using standard HTTP requests.
This tutorial aims to show how easy it is to integrate our weather API into a Next.js project, and will guide you step-by-step in getting your project up and running.
Prerequisites
To follow along with this tutorial, you’ll need the following:
An Xweather subscription or free trial
Working knowledge of HTML, CSS, JavaScript, React.js, Node.js, and either NPM or Yarn
The following software installed:
NPM or Yarn
Code editor, such as Visual Studio Code
Once these prerequisites are met, it’s time to start building!
Creating a Next.js App
Follow Next.js’ guide on creating a new Next.js project here. For this tutorial, you’ll need to decline to use the experimental “app/” directory. After you’ve created your project, start the server and test that it works by visiting your browser’s localhost:3000 - You should see a Next.js splash screen. If you have an existing project, feel free to use that instead, but note that you may need to tweak some of the instructions here based on your project’s needs and structure.
Adding the Weather API module
Now that you have successfully created your Next.js project and tested that it works, the next step is to integrate the Weather API module into your project to begin supercharging your application with weather data. Adding this module is easy and only requires a few steps:
Open your terminal, ensuring you are navigated to your project folder, and enter the following command:
Import the module into your project by adding the following line somewhere near the top of your index.tsx file (located in src/pages/):
Set your Xweather API account access keys.
Add the following line to that index.tsx file:
IMPORTANT NOTE: While we have assigned these keys in this way for the sake of this tutorial, it is STRONGLY RECOMMENDED that you do not expose these keys in a fully-deployed application. It is recommended to make use of a strategy such as a .ENV file or another environment variable setup to protect your keys and prevent unwanted access.
Import the CSS into your project by adding the following line just below your import:
Correcting the error
If you attempt to run your project at this point, it will fail, citing an error that reads “Global CSS cannot be imported from within node_modules.” This error can be a major pain point among new Next.js developers, and is the result of a restriction placed on Next.js projects by default. This restriction is due to be lifted in an upcoming release of Next.js 13+, which ties into the aforementioned “app/” directory. In the meantime, this error can be resolved by adding the following code to the nextConfig object in your next.config.js file:
Once you have done this, restart your server for the change to take effect. Then simply reload the page – the error should now be resolved.
Using the Weather API
Now that your project is built and configured, it’s time to put it to work! The Weather API module allows you to take advantage of a plethora of weather data using a few different strategies. Most of the hard work is already done and accessing the data from here is plug-and-play.
The Weather API can be easily tested by adding the following code snippet to your index.tsx file:
Once added, reload your page and check your in-browser console - if everything’s been configured correctly thus far, you will see a message displaying the current weather here. Congratulations! You can now freely use our powerful API and integrate our weather data into your application.
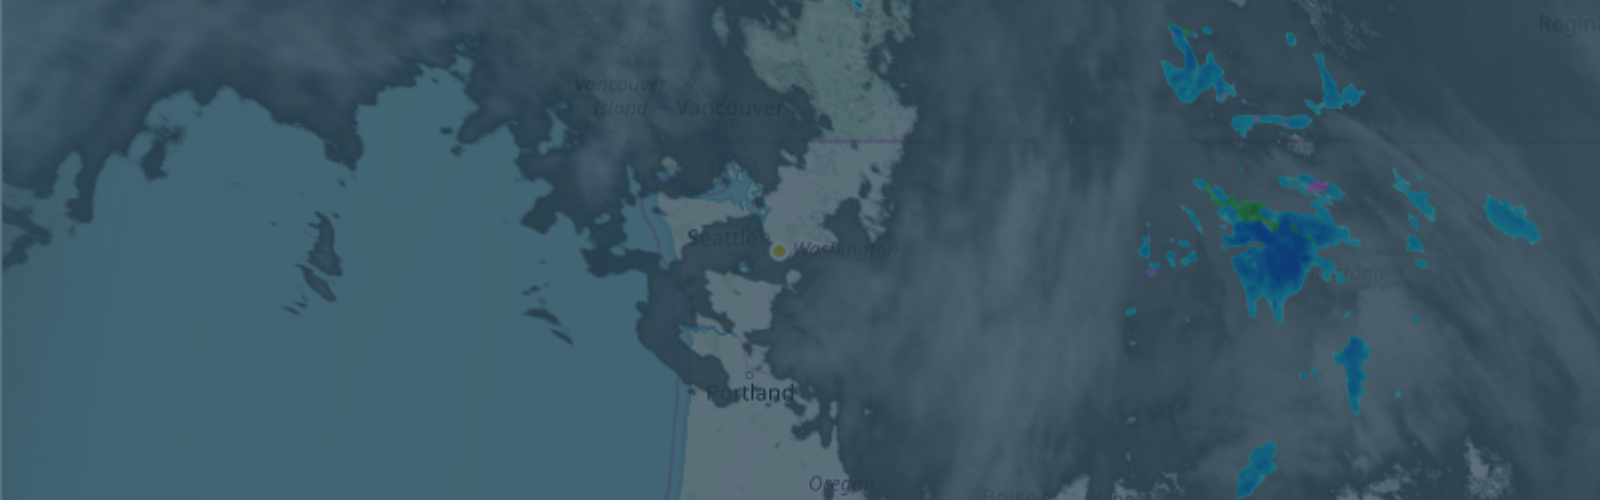
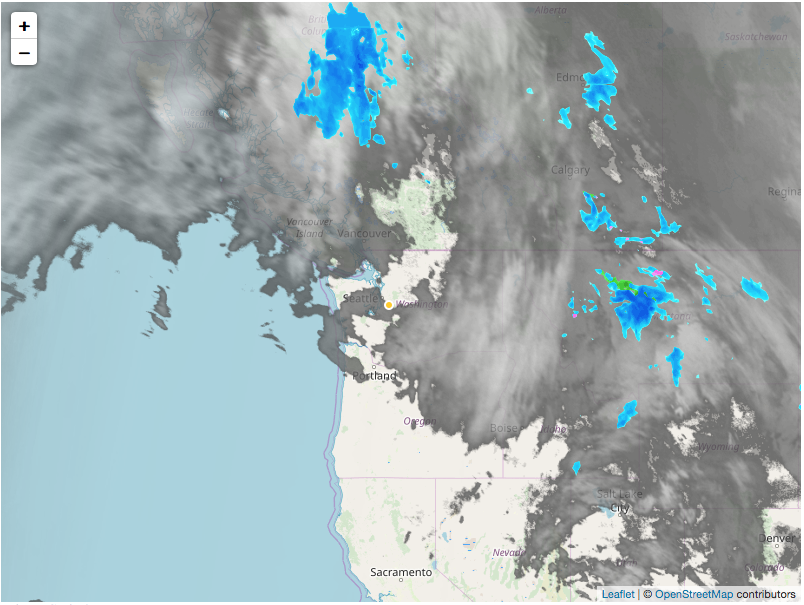
Creating an interactive map
Interactive maps, like the baseline API, are relatively plug-and-play. To test one for yourself, go ahead and add the following snippet to your index.tsx file. Be sure to place this within the component function, before the return:
Then, within your component’s “return(),” replace <main> and its contents with a new container such as a <div> and add the HTML ID “map” to it. You’ll want to style this container with a generous width and height so it will properly display on the page. From here, refresh your browser - you should see your interactive map. Feel free to tinker with the map options within your code. You can find more on customizing an Interactive Map, along with more advanced implementations, here.
Note: If you encounter an error that states that the map container is already initialized, you will likely need to load the site in a private tab or clear your browser cache.
Creating an Interactive Map App
Lastly, for a more robust map with options for inputting a location and toggling layers, we will create an Interactive Map App. This will require one small tweak to work. First, add the following line of code alongside your other imports:
Then, add the following code snippet to your index.tsx, once again being sure to put this within your component function:
useEffect is a React hook that will ensure that the map doesn’t get applied to the container element until after the page has rendered, and without it, you’d see errors in your console and the map wouldn’t load. Thanks to this fix, you now have a working Interactive Map App in your Next.js project. Feel free to tweak and customize this to your heart’s content - you can find more information and examples here.
Conclusion
You’ve now successfully integrated the Weather API into a basic Next.js project and overcome a few of the common snags along the way. From here, take your existing Next.js projects to the next level with robust weather data and powerful mapping tools, or use this project as a base for your next application!
)

)